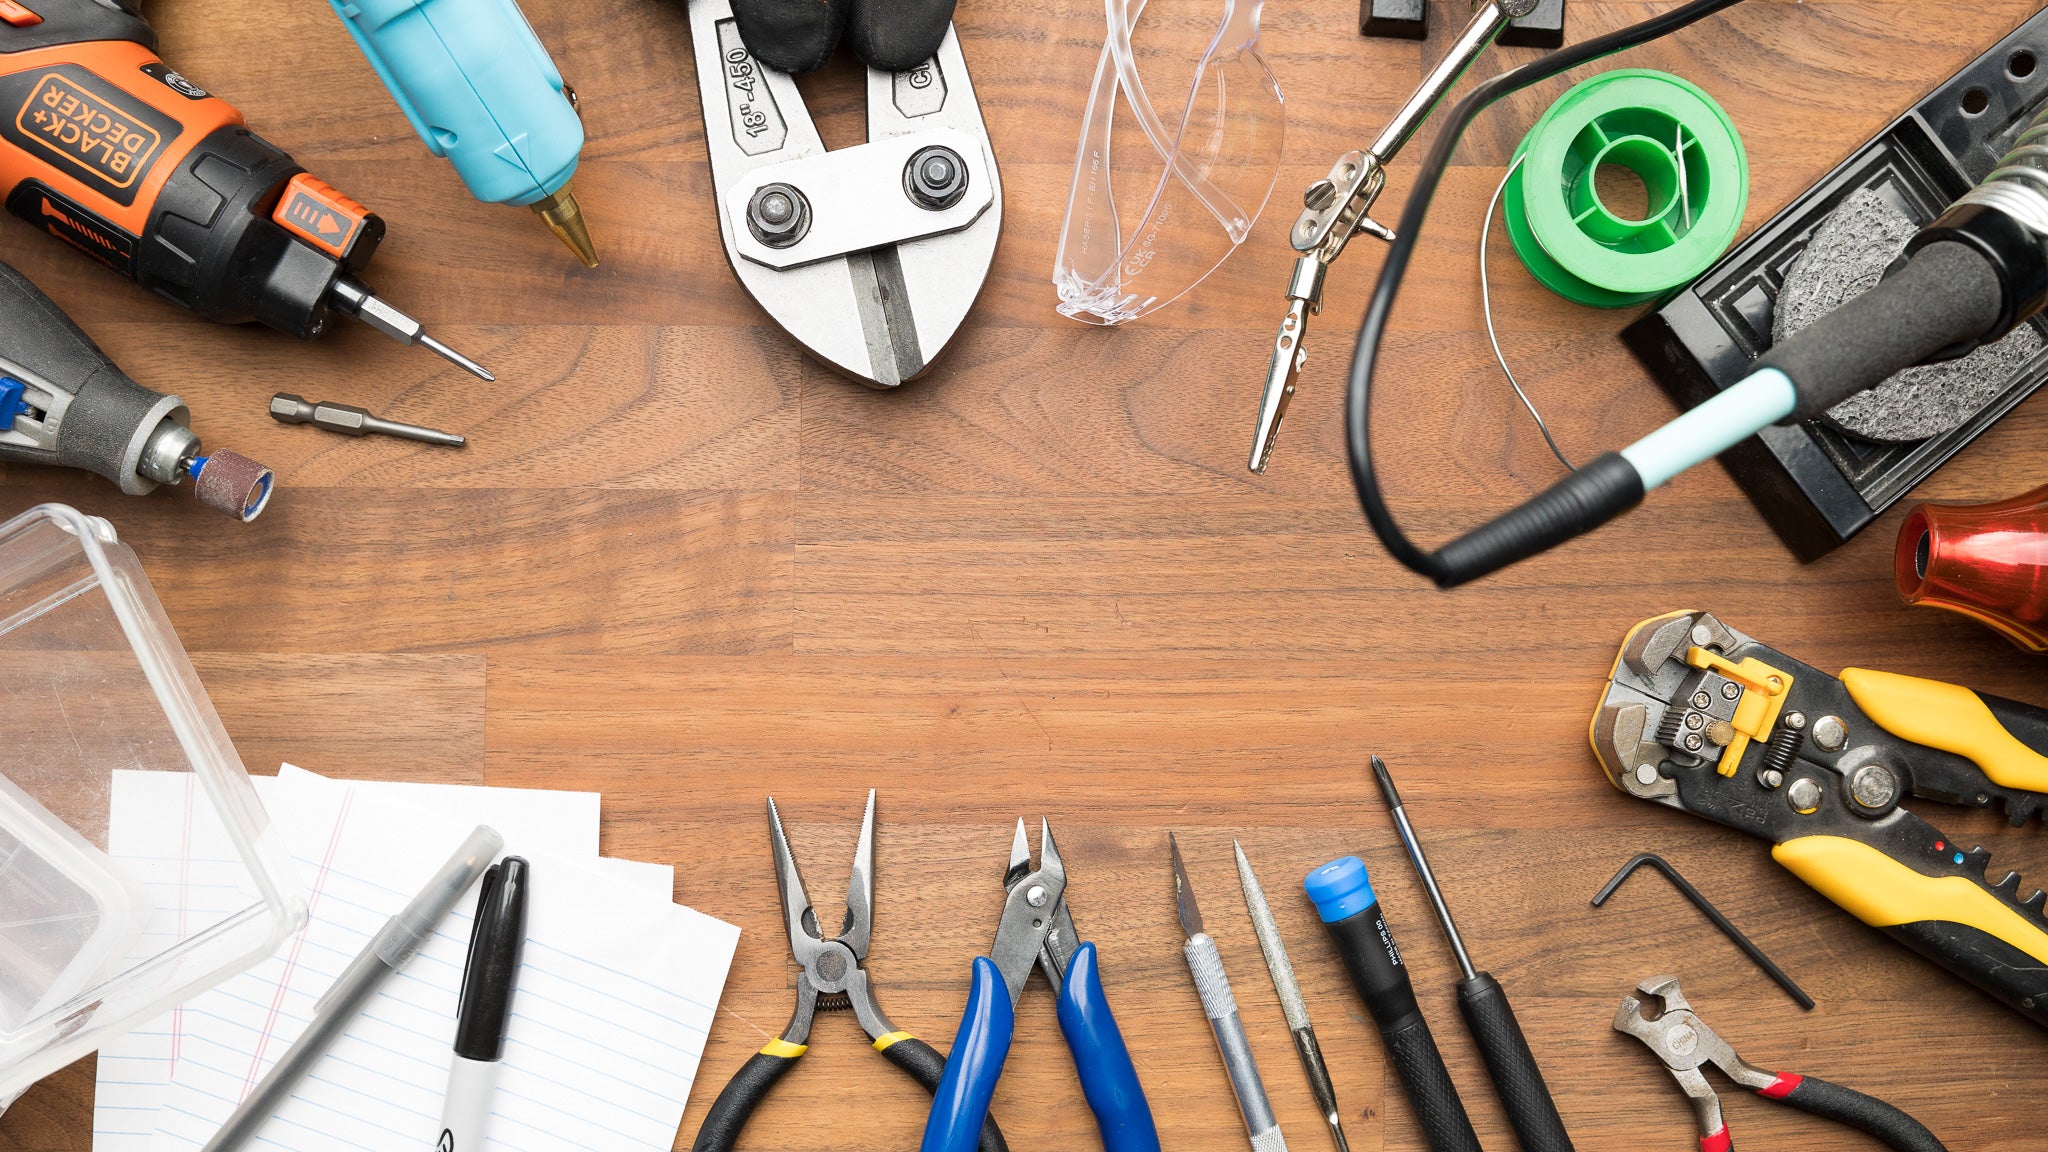
TOOLS OF THE HOBBY
Veteran modders and makers in the hobby are sometimes known for having many tools, and looking at their workshops can make starting your own project seem daunting. But you don’t need a workshop full of equipment to start out! The following is a list of tools you might need and some upgrades to consider as you start your modding journey. We’ll provide any links to tools we sell on the shop and a couple of recommendations on where to find quality tools we don’t carry.
SAFETY FIRST!
-
Eye Protection:
The first thing anyone needs in their kit is a pair of safety glasses or safety goggles. With the simplest pairs as little as $2 each, they don’t make sense not to wear. These are required when cutting or installing springs, grinding out plastic, soldering joints, and, most importantly, flinging foam. Your eyes thank you in advance. -
Disposable Gloves:
When working with paints, epoxy, and other adhesives, it’s good to have a box of nitrile or latex gloves. -
Work Gloves:
These are less important unless you’re cutting springs, but it’s good to have them on hand to save you from cuts and scrapes. They don’t need to be pretty; the cheapest split leather ones will do just fine.
MARKING, NOTE-TAKING, + ORGANIZATION
-
Pen, Pencil + Paper:
Whether it’s checking off a list of tools and supplies, marking the location of differently sized screws, or documenting your own custom project, there is nothing a hobbyist should need more than something to write with. We have some pens, a small tablet, and a stack of sticky notes in nearly every area of the warehouse for this purpose. -
Fine Point Permanent Marker:
When pens and pencils aren’t up to the task, sometimes you need something stronger. We commonly use black and silver Sharpies to make high-contrast marks on wire, metal, and plastic, making it incredibly easy to see where you need to cut, sand, or glue before you commit. -
Craft Foam + Sticky Tack:
Alternatively to pencil and paper, you can use "The Bobololo Method." Cut some craft foam or mold some sticky tack putty into the shape of your blaster. Then, when removing screws and other small parts, push the screws into the foam or putty where they go in the blaster. Knowing where longer or specially-shaped screws go makes reassembly ten times easier. -
Parts Organizers:
Having organizers and bins to put blaster parts in can save you many headaches when putting blasters back together. Some cheap containers built for this purpose are available at many hardware stores, but you don’t need anything too fancy, but a magnetic parts tray for screws and springs is very handy. To make your own parts bins, you can reuse old yogurt or sour cream containers and their lids.
SCREWDRIVERS + FASTENING TOOLS
-
Small “Precision” Philips Screwdrivers:
The screw you’ll encounter most often when modding off-the-shelf blasters (and assembling the Out of Darts Jupiter) will have a Philips head. A #1-sized screwdriver is as nearly universal as you can get; in a pinch, it can be used on both larger and smaller-sized screws (though you need to be careful you don’t strip out the screw). However, you are golden if you can find a driver set that is comfortable for your hands with size numbers 0, 1, and 2. We recommend “precision” drivers because they have a spinning base and a narrow shank to fit into deep recessed screw holes. -
Hex Drivers:
Many hobby-grade and community blasters – including many of the ones available on our shop, avoid using #1 toy screws in newer designs. Instead, metric machine screws into heat set inserts make a more durable product that’s easier to take apart for repairs and maintenance. At the minimum, you need an M2.5 hex key, but getting a set with other sizes wouldn't hurt. -
Flathead Screwdrivers:
Some Captain Slug (and Slug-Adjacent) blaster kits use wide, flathead screws to secure barrels and other parts that might need to be easily removed. Otherwise, smaller-sized flathead screwdrivers and plastic “spudgers” are great for pulling apart clipped-together blasters, removing 3D-printed support material, or separating other parts. -
Pliers + Tweezers:
There are many cases where fingers are too large and fleshy for modding and assembling blasters. You can use pliers in demolition to remove tiny bits of plastic and wiring, and tweezers can help align small springs and parts in tiny spaces. Various sizes are helpful for different purposes, but we would recommend starting with 4-5” long needle nose pliers with some sort of spring keeping them open. -
Mallets + Hammers:
Many hobby-grade blasters, like the ZWQ S200 series blasters, require setting pins during assembly. A mallet is the best tool for the job, though, in a pinch, you can use a metal hammer and a cloth rag, so you don’t mar or damage the blaster shell’s surface. -
Pin Punches:
Pin Punches can help install the pins that last millimeter before they’re fully set. These are nice to have, but you can also use an old stock brushed dc motor. The shaft on those will set all but the tiniest pins.
CUTTING TOOLS
-
Hobby Knife:
Precision knives, like an X-Acto, are great for cleaning up cuts, trimming small bits of plastic, 3D parts, etc. In a pinch, you can use it to carefully strip away wire insulation if you don’t have a wire stripper handy. I tend to keep two of these handy, one with a fresh sharp blade for making cuts and one with a dull blade for cleaning up edges and places that may break off the tip of your hobby knife. -
Snips, Flush Cutters, + End Nippers:
These tools are great for cutting wires and even bits of plastic off blasters. They can be used in place of a rotary tool in many cases and with less mess. -
Wire Strippers:
There are many types of wire strippers. Any style will do, but if you’re modding a lot, automatic strippers are extremely handy. -
Bolt Cutters:
These are required if you have to cut a spring. Always use eye protection when cutting. -
Box Cutters + Scissors:
The packaging doesn’t open itself! Additionally, a good box knife can take the place of a chisel, hobby knife, or wire stripper if necessary.
ADHESIVES + TAPE
-
Super Glue + Setting Spray:
Cyanoacrylate glue (AKA super glue or CA glue) is great for attaching plastic parts together. Be careful not to use too much when setting switches, as it can stop them from working properly. I like the thicker CA glue as it tends to stay right where you left it. If you need to work quickly, setting spray or baking soda can help CA glue cure faster, but you usually don’t have to wait as long as other adhesives. -
Heat Shrink:
Heat shrink is necessary for any soldered connection to a wire or battery connector. We often provide precut heat shrink in our complete mod kits, but 4.5mm (3/16") and 12mm (1/2") size heat shrink is good to have in your tool kit for custom projects. -
Electrical Tape:
Electrical tape is great for bundling wires or using in places where heat shrink can’t be used. -
Duct Tape:
Nobody should be without duct tape. I use it constantly to mock up parts and assemblies before gluing. -
Epoxy Putty:
Epoxy putty is a 2-part putty that can be kneaded together to activate it. I personally like EP-200. This product works well as a gap filler or to place switches. Use in a well-ventilated area, as it does smell rather strongly. -
Painter’s Tape + Masking Tape:
Tape can mask off parts you don't want to be painted. It’s also helpful in holding shells together or holding other parts in place. -
Hot Glue:
Hot glue is one of my all-time favorite adhesives. They are great for holding down wires inside a blaster and switches. We recommend full-sized high-temp hot glue guns for most applications, as they get hotter faster and adhere to things better. Some cheaper hot glue guns are fine, but generally, the more you spend, the higher quality tool you’ll get. -
E6000, Goop, + Epoxy:
These are more specialized adhesives. they have much longer cure times, up to 3 days for a full cure but will hold almost any material together. I like to use these when attaching different materials together such as foams, plastics, and metals. -
Thread Locker:
A little semi-permanent thread locker, like the blue Loctite, can ensure motors and other parts won’t work themselves out of place. If you’re purchasing your thread locker elsewhere, check the safety data sheet online to ensure it is PLA-safe. Do not use thread locker on polycarbonate!
SOLDERING SUPPLIES
-
Soldering Iron:
It’s virtually impossible to mod an electric blaster without these. A soldering iron is used to melt and apply (flux) the solder to connect two points in a circuit. The points can include wires, switches, battery connectors, motors, and more. Avoid the cheapest ones on the shelf, like the ones that plug straight into the wall. However, you don’t need to go too fancy; a mid-range soldering station like the Weller WLV100 will do just fine. -
Solder:
Solder is a conductive metal with a low melting temperature used to join pieces of a circuit together. We only recommend lead-free rosin core solder, and we have good experience with 1.5mm diameter solder with 2% rosin core. -
Soldering Iron Tips:
While one soldering iron tip should last a beginning modder a long time, finding replacement tips can be a headache. Find out what size and model of tips your iron takes, and grab a few to store with your kit as a backup. When not in use, keeping your soldering supplies in an airtight container is an excellent way to help the tips and solder last longer.
Bonus tip: If you can find a heat-set-insert tip for your iron, this can help in custom projects where you want a more durable way to screw two parts together. -
Sponge:
A sponge is an absolute necessity for soldering. A damp sponge is used to remove excess solder and clean the iron in between each solder joint. Most worthwhile soldering irons will include a sponge in the kit, but a fresh, unscented kitchen sponge from the grocery store will also work. If it’s a larger sponge than your soldering iron holder will allow, cut it to size with a pair of scissors. Remember: If it’s a clean Iron, it’s a happy iron. -
Metal Sponges + Brass Wool:
In addition to a regular sponge, a metal sponge is a useful last resort to remove stubborn oxidization and other gunk from your soldering iron tips. Avoid excessive use, as it will wear your tips down faster. -
Tip Tinner:
If you’re soldering a lot, I find that Tip Tinner is convenient to tin/clean your soldering iron. This paste helps remove oxidation but wears down your tip faster, so use it only when needed. Store this away from electrical components like circuit boards, and always close the container after use. -
Helping Hands:
Sometimes called a “third hand,” helping hands are a pair of small clamps with locking, articulating arms on a weighted base. These can hold wires, switches, and other electrical components in place, making soldering joints less of a juggle. They cost as little as $5, and even the inexpensive ones will do the job just fine. We don’t recommend quad-hands or helping hands with flexible arms, as they tend to move around too much, at least for modding applications.
OTHER TOOLS + SUPPLIES
-
Disposable Cups:
Paper or plastic cups are perfect for mixing epoxies and other glues. My buddy Bobololo also uses them as makeshift paint-drying stands by turning them upside-down. -
Rasps + Files:
Perfect for shaping, getting rid of plastic, cleaning up cuts, and other demolition, smaller miniature “needle” file sets are ideal for many modding applications. -
Sandpaper:
Most paint jobs and other cosmetic mods will start with some sanding. Starting with coarse sandpaper (80-120 grit) and gradually working up to finer sandpaper (800-1200 grit) will leave your parts smooth and ready to paint. -
Lubricants:
Super Lube, Slug Slym, and other lubricants can be used on internal mechanical plastic parts to lubricate them. Ironically, Super Lube can also be used as a temporary adhesive when setting small parts like trigger springs. - Multimeter:
A voltmeter or multimeter is perfect for checking battery voltage, circuit polarity, and continuity (the continuous flow of electricity through a circuit).
UPGRADES TO CONSIDER
- Electric Screwdriver:
This is considered a luxury tool, but if you’re modding many blasters, this can save time and your wrists. The best ones are compact and have a clutch system to prevent you from tightening screws too much. Use caution, and never use a power drill to drive in shell screws. They have far too much torque, and you’ll likely strip the screws and the plastic most blasters screw into. - Rotary Multi-Tool:
Rotary tools, like Dremels, can make quick (if messy) work of cutting out screw bosses and plastic ribbing in blasters. To those that choose to use them, they can be a godsend. Rotary tools come in nearly every shape and size and can even be attached to contraptions that turn them into mediocre drill presses. However, the only attachments you’ll probably need are cutting discs, sanding drums, and grinding stones. - Heat Gun:
While you can use the side of your soldering iron to activate heat shrink tubing, a heat gun is often easier to work with, and it can be used to clean stringing and other minor defects from 3D-printed parts. - Power Drill:
Drilling holes for wire paths is easiest with a drill. A rotary tool can also do this job with the proper bit, but there’s no replacing the real thing. Cordless drills often come with a battery, charger, and a few drill and driver bits, but don’t forget to grab some spares. Again, do not use a power drill for driving in shell screws.
Well, that's our list of beginner's modding tools, but it's by no means a complete rundown of every tool we have in our workshop. Do you think we missed something important? Contact us with the link above, and we'll consider adding it to our list!